![]()
Choosing the Number of Rows and Columns
Use the Table Design tab of the Table Properties box to change the number of rows or columns in a table.

Use the plus (+) or minus (-) signs next to Columns or Rows to adjust the number.
Alternatively, place the cursor within the table then add or remove columns relative to that cell. See Adding or Removing Rows and Columns.
Adding or Removing Rows and Columns
To add or remove table rows and columns, follow these steps.
Note: You can also adjust the number of rows and columns using the Table Wizard. See Also: Creating a Table Using the Table Wizard1. Click Table ().2. Click Table Wizard (circled below).3. The Table Wizard dialog appears.4. To change the number of columns or rows, click the plus or minus signs (+ -) next to Columns and Rows.5. The image adjusts to show the number of rows and columns.6. Press OK.7. Begin entering text and images into the table cells. To further modify the table, see Modifying Table Properties..
1. Place the cursor in the cell from which you want to add or delete rows or columns.
2. Right click the mouse. A menu appears.
Menu options relating to adding/removing rows or columns are highlighted below.

3. Click the appropriate menu option. For example, to add a row above the current cursor location, click Insert Row Above.
Note: These options are also on the toolbar. 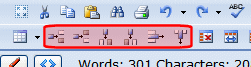


![]()